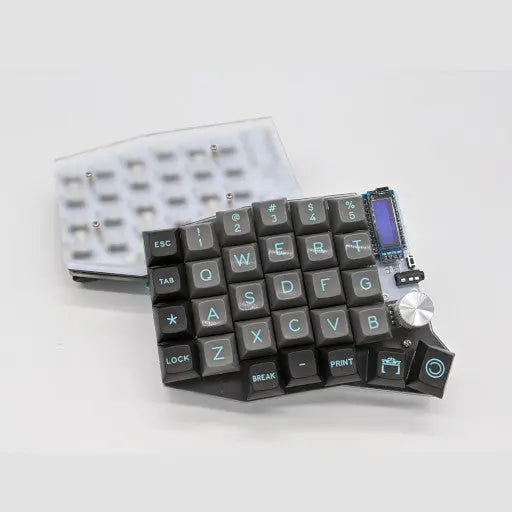


Lily58 Pro Keyboard Kit
Lily58 Pro Keyboard Kit
Notify When Available
Get an email when this product is back in stock.
We respect your privacy and don't share your email with anybody.
Couldn't load pickup availability
Pro = MX/Choc Switch Support
Pro RE = Rotary Encoder Support
Precompiled firmware can be found here.
Kit Includes
Required to Complete
2 x 4Pin Header Socket (Enable Display Hot Swap)
Build Instructions
This keyboard is designed originally by Naoki Katahira and modified to create the Pro RE by Ergohaven
Share


First time I've built a keyboard. Super happy with the result. Good to have an Australian retailer so I didn't have to wait too long for shipping.
The GitHub build guide can be a bit confusing at times so it's best to also consult a YouTube video build guide or any other resources you can find online.
Also you should buy a longer TRRS cable online as the supplied one in the kit is a bit short. I like to have my keyboards split around shoulder width apart which the supplied cable didn't allow for.
All parts arrived in excellent quality and my new keyboard came together very well
This was my first non-standard keyboard try. Got everything needed (less switches and caps, of course). Guidance on build was easy enough to find. Having a great time working with the finished product. Thanks for putting this together.
Items were delivered quickly and was provided updates for every step of the process. Items also were packaged securely without any issues.
Kit was easy to put together with just a basic soldering station. Main confusion would be around flashing the firmware onto the boards as it changes depending on the board you have purchased.
Was a fun build and will probably get a few more kits to play around with in the future.
The kit was great, and easy enough to build.
The linked instructions in GitHub were a little confusing in places however - particularly the section around attaching the display. If the instructions are followed and the display is soldered to the board, you can't easily swap out the controller when using the recommended headers.
I found though that soldering the display to the headers, and just friction plus the plexiglass display protector were enough to hold it in place without solder.
Additionally, the flashing instructions on the GitHub don't quite apply, depending on which controller is used
Some brief additional build notes could make this process a bunch easier