Skip to product information
1 of 4

Lily58 Pro Keyboard Kit

Lily58 Pro Keyboard Kit

Regular price $112.00 NZD
Regular price $0.00 NZD Sale price $112.00 NZD
Sale Sold out
Taxes included. Shipping calculated at checkout.
Version
Switch Type
Color
×
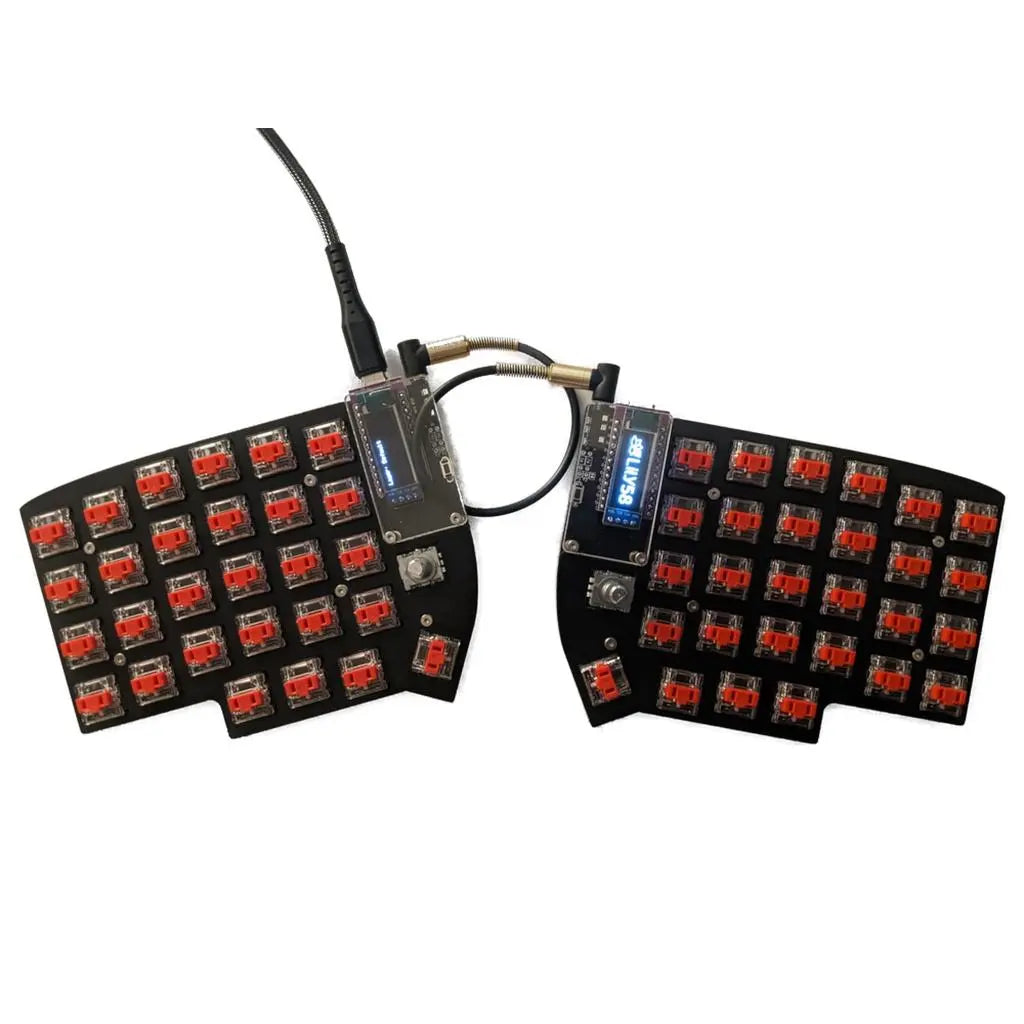
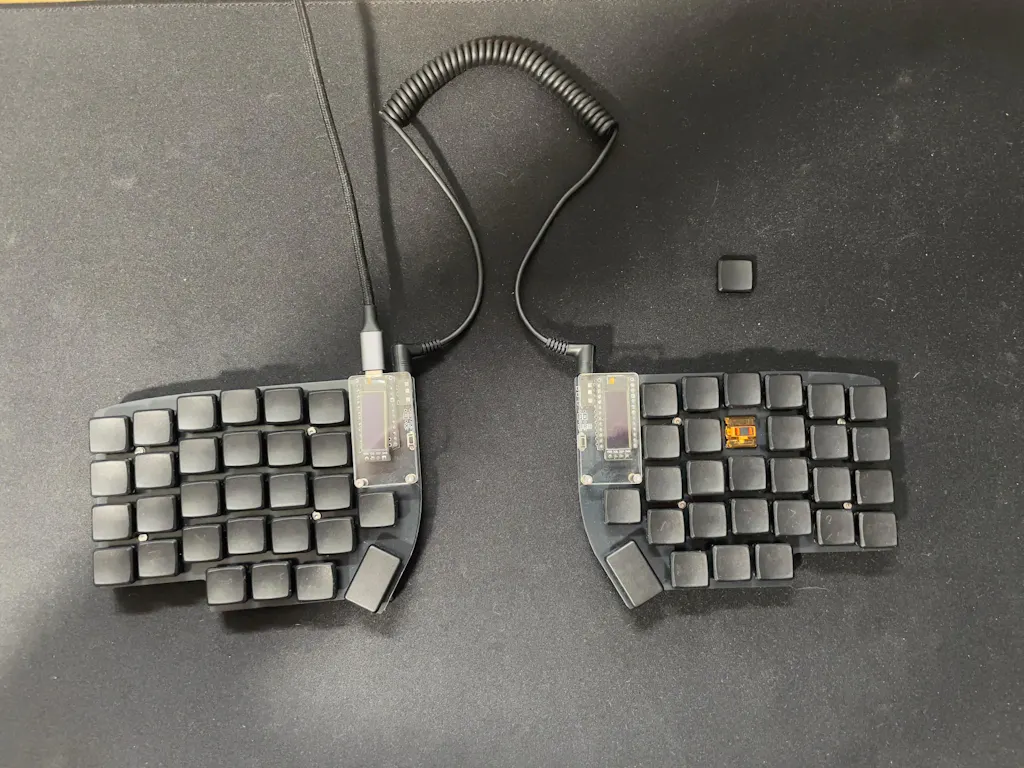
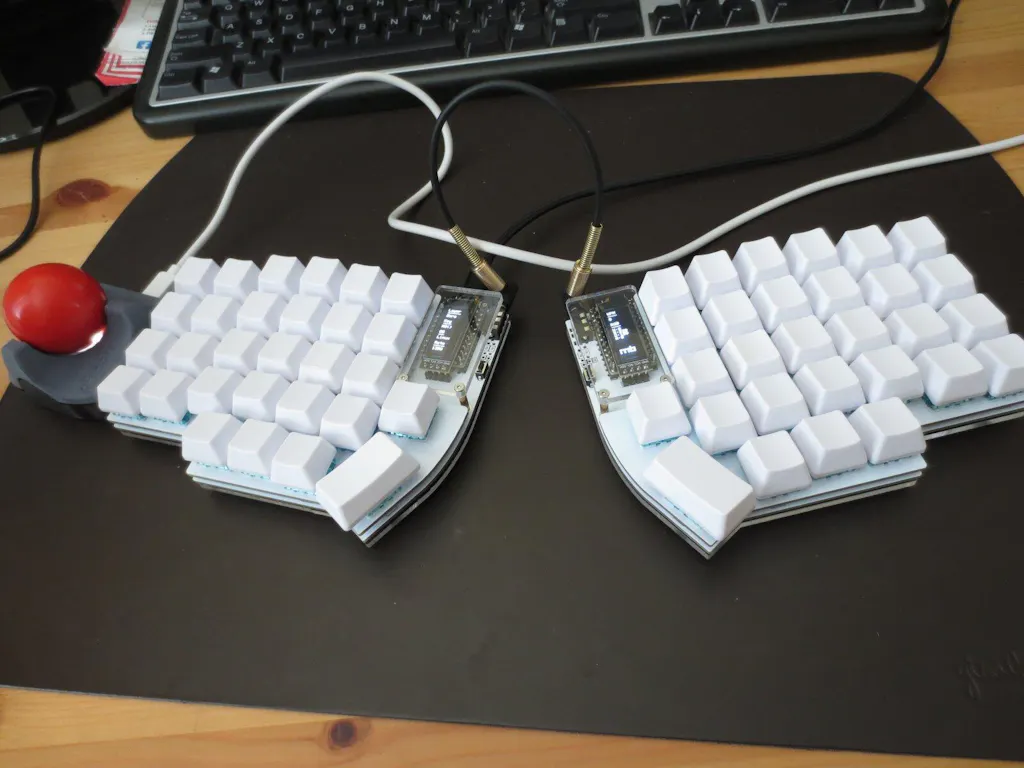
The Lily58 Pro/Pro RE keyboard is a 6×4+4keys column-staggered split keyboard.
Pro = MX/Choc Switch Support
Pro RE = Rotary Encoder Support

Precompiled firmware can be found here.

Kit Includes
2 x Lily58 Pro OR Pro RE PCBs
2 x Lily58 Pro FR4 Switch Plates
2 x Acrylic Bottom Plates
2 x Acrylic OLED Covers
1 x TRS Cable
2 x TRRS Jacks
2 x 3x6 Tactile Switches
2 x OLED Displays
4 x 10mm Brass Standoffs
10 x 7mm Brass Standoffs (MX Normal Profile) OR 5mm Brass Standoffs (Choc Low Profile)
58 x Kailh Hotswap Sockets (MX Normal Profile) OR Choc Low Profile Sockets (Choc Low Profile)
58 x Diodes (SMD)
28 x Screws
8 x Rubber Feet

Required to Complete
2 x Pro Micro Controllers (Headers to Direct Attach)
56 x Switches
56 x Keycaps

Optional Items
2 x EZ-Solder Headers (Enable Controller Hot Swap)
2 x 4Pin Header Socket (Enable Display Hot Swap)

Build Instructions
Lily58 Pro Build Guide

This keyboard is designed originally by Naoki Katahira and modified to create the Pro RE by Ergohaven
View full details

Customer Reviews

Based on 12 reviews
67%
(8)
33%
(4)
0%
(0)
0%
(0)
0%
(0)
P
Patrick M.
First kit, great experience

Items were delivered quickly and was provided updates for every step of the process. Items also were packaged securely without any issues.

Kit was easy to put together with just a basic soldering station. Main confusion would be around flashing the firmware onto the boards as it changes depending on the board you have purchased.

Was a fun build and will probably get a few more kits to play around with in the future.

M
Matt T
Great kit, somewhat confusing build guide

The kit was great, and easy enough to build.

The linked instructions in GitHub were a little confusing in places however - particularly the section around attaching the display. If the instructions are followed and the display is soldered to the board, you can't easily swap out the controller when using the recommended headers.

I found though that soldering the display to the headers, and just friction plus the plexiglass display protector were enough to hold it in place without solder.

Additionally, the flashing instructions on the GitHub don't quite apply, depending on which controller is used

Some brief additional build notes could make this process a bunch easier

R
Ryan Sickle
Fun to put together but…

I’m an avid Mx switch user migrating to choc switches. I installed the sunsets on these and it just doesn’t do it for me. I’ll give it some time but I might install mx sockets on here instead.

Also note for those wanting to install the nice!view on this board. The nice!view five pin connector isn’t directly compatible with the pcb printed by keebd, you need to do a bit of a hack. May not be a big deal for some but if I had known I would’ve had the specs printed myself because I know you can get it printed with the 5 socket for the oled.

M
Mark Ng
lily58 pro

Takes a little getting used to keyboard layout.

Pcb pads fell off on one side while trying to bridge two pads for OLED. Will have to live with it.

K
Kevin Varela
My first Kit, first time soldering, overall good kit but recommend getting spare components

Quality kit, but you're given like 1 extra diode if you make a mistake so I suggest looking at buying just a bit extra components. Those diodes are so small. Spent an hour looking through carpet to find the ones I dropped.

The oled display is not really compatible with hotswap controllers. Basically you solder in the hotswap headers then the controller, but after, you have to solder in the display which will cover the controller, which didn't make sense to me so I opted to not put in a display.